How to Make a Ristra
Note that Ristras are a tradition in New Mexico and other regions where it’s very dry, humid regions may not work for this process, and you may need to use a dehydrator or oven at super low heat to dry chile peppers. It is also important to use ripe red peppers that are ideal for drying, such as New Mexico Chile, Hatch Chile, Chimayo, or Cayenne or Thai peppers.

How to Make Your Own Ristras:
What You'll Need for Ristras:
- Chile Peppers (ideally mature red chile - Chimayó are one of the best!)
- String
- Weaving Needle
- Scissors

Step 1:
Thread your string through the needle. Be sure to pull enough string through that you can work without it coming back out of the needle again.
Step 2:
Thread your chile. You will want to thread through the base of the stem since this is the hardest part of the fruit to split. As you thread each chile, slide it down the string to join its friends. Prepare for a few of your chiles to split or fall off the thread at some point during this process.

Step 3:
Grab a hold of the string beside your first and last chiles and pull them together to form a ring. Tie the two ends together in a quick double knot.Step 4:
Hold onto the end with the needle still attached and thread it under the opposite side of the ring, leaving enough slack in the center for hanging. Tie another knot and you should be able to pick up the chile bundle with its new little handle.

Step 5:
Snip off the excess string on either side of the ring.Step 6:
Repeat steps 1-5, leaving a slightly longer length of string for the handle. Take the handle of your second bundle and poke it through the middle of the first bundle so you can gather the two string together for hanging. Tie a knot near the base of the string.

Step 7:
If you have used up all your chiles, skip to step 10. If you still have a chile mountain, either add a third ring to your chili bundle, start the process over again or try out step 9.

Step 8:
Line your remaining chiles up against your string. Guesstimate how many chiles you will need on the string so that you still have half remaining, then thread 'em.

Step 9:
When you think you have reached the halfway mark, leave a gap in the string. This will be used for hanging, so make it 10 or so centimeters long. Continue threading the remaining chile.
Step 10:
Tie a knot at both ends of your string to avoid escapees. Trim off the excess.

Step 11:
Find a dry, well ventilated area to hang your chile Ristra. We hang ours in the sunlight in our kitchen, which admittedly is not ideal, but the sunlight helped to keep them dry in the winter, plus it looks great and they're right there when we need them for cooking. I have used S hooks for hanging. Hanging the ristra in a sunny spot with good air flow for several days or weeks until it’s fully dry is the best way to preserve the chiles. Then, you can leave it outside for decoration, but we recommend to bring it indoors if you want to use the chiles for cooking. To use them, just snip chile pods off by their stems, working from the top down.Step 12:
Use Ristras to decorate your home, and enjoy them in your cooking all year long! You can make Ristras from any chiles, including super hot peppers! They're great to crumble into salsas, for use in making hot sauce or for grinding into homemade hot pepper flakes!Original post via Offbeat Home & Life.
Photos via H-E-B.
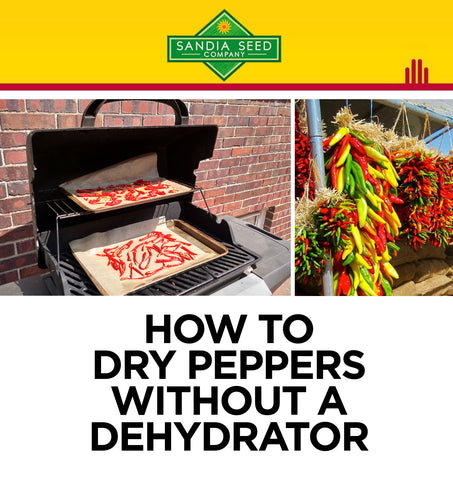
There are also other ways to dry your chile other than Ristras!
Here are a few or our tips on
How to Dry Peppers without a Dehydrator »

Running out of room?
One of our favorite ways to use up dried chile such as those in Ristras is to make hot pepper flakes, as they can be stored in glass jars in the pantry, and really pack a lot of flavor into a small space, you can fit a whole Ristra of peppers into glass canning jars if you grind them into flakes.
Find a great selection of our easy-to-grow Red Chile Seeds:

